
The orange suitcase slides toward the middle of one shot. In the next, it jumps to the far side of the frame. Each clip works on its own, but the edit breaks the movement. A foreground wipe can give you a more forgiving place to cut. Let a station pillar hide the suitcase, make the edit while it is out of sight, then bring the case back along the same path.
Sketch the hidden moment twice, once at the end of shot A and once at the start of shot B. Put the pillar edges, tile seams and window light in the same places. Then draw the approach to the pillar and the exit from its right side. Those outer frames tell you which direction the case was going, even though the middle frames hide it.
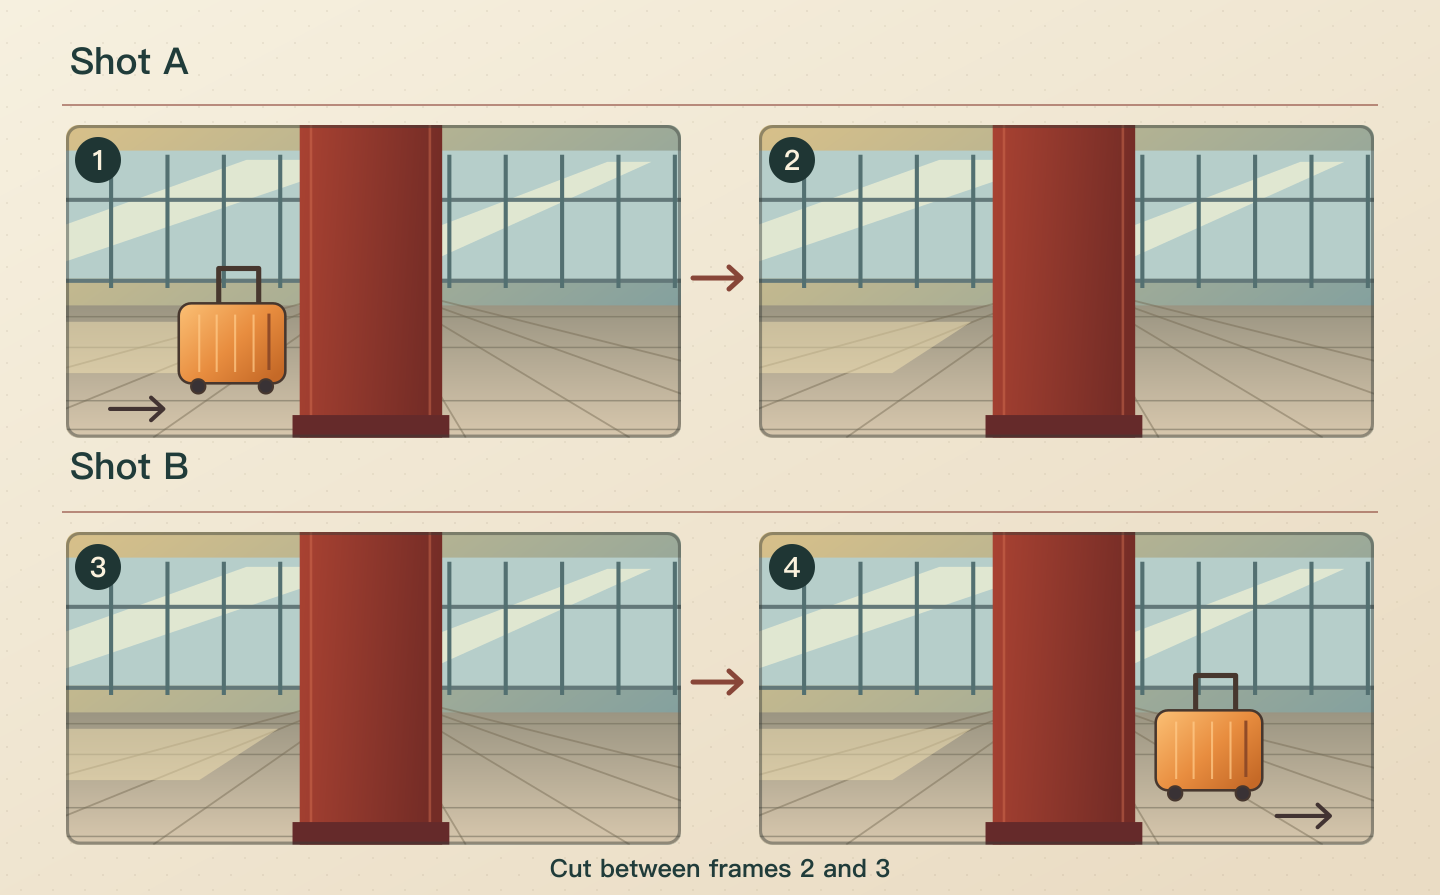 Storyboard illustration. Cut between frames 2 and 3 while the pillar conceals the case in both shots.
If you are making the frame images yourself, mark the floor path before you move the case. Keep the camera at the same height and angle. These references make it easier to tell whether the case follows the same route when it disappears and reappears.
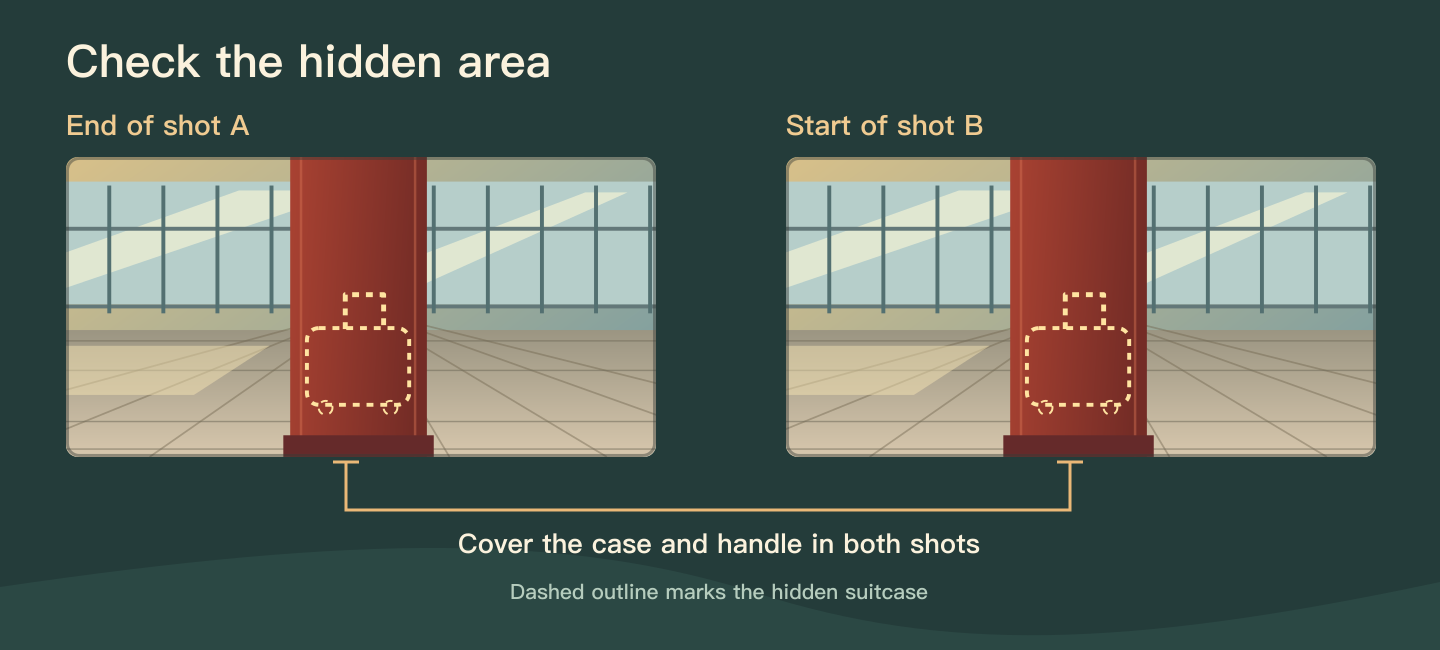 Planning diagram. The dashed outline shows where the hidden case and handle sit behind the pillar.
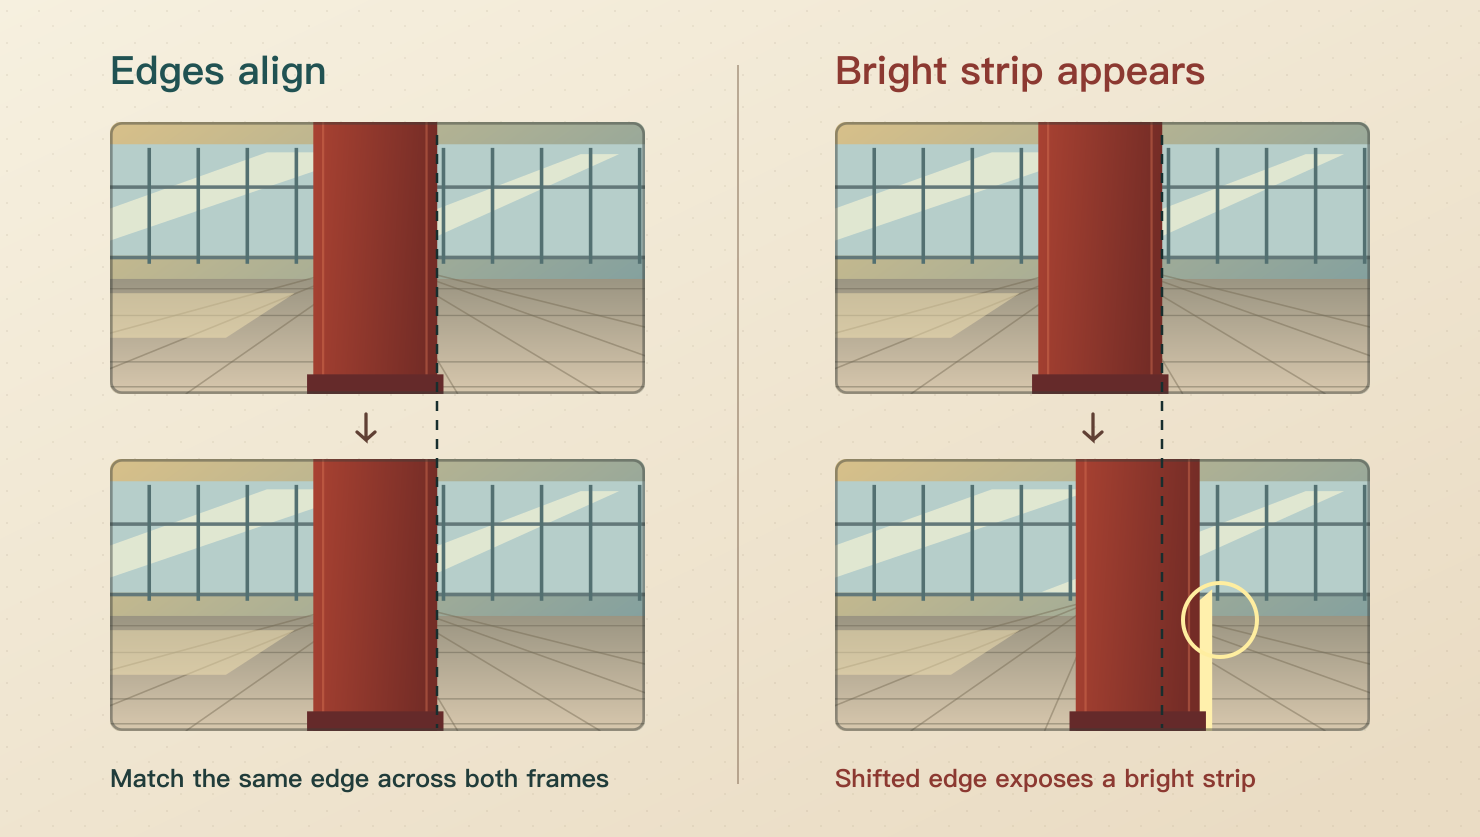 Cut comparison. Step over the edit and watch the same pillar edge for a jump or a flash of exposed background.
Once the motion reads at normal speed, listen again. A sudden change in the wheel sound can make the cut noticeable even when the picture matches. Use room tone you have permission to use, or try a short overlap if both audio tracks are clean. Watch and listen all the way from the approach to the exit. The hidden moment should leave enough evidence on either side for the viewer to follow the same case.
The AI VideoWeb team at FLAQ TECH PTE. LTD. prepared this guide with AI assistance for writing and illustrations. It includes links to AI VideoWeb and Flaq AI.
Draw the cut before writing the prompts
Picture a fixed camera facing a tiled station concourse. A dark red pillar fills the centre of the frame. Behind it, a rolling case moves from left to right along one tile seam. The pillar should be wide enough to conceal both the case and its extended handle.Sketch the hidden moment twice, once at the end of shot A and once at the start of shot B. Put the pillar edges, tile seams and window light in the same places. Then draw the approach to the pillar and the exit from its right side. Those outer frames tell you which direction the case was going, even though the middle frames hide it.
If you are making the frame images yourself, mark the floor path before you move the case. Keep the camera at the same height and angle. These references make it easier to tell whether the case follows the same route when it disappears and reappears.
Sketch shot A and shot B separately
Use AI VideoWeb to sketch the approach and the hidden end of shot A. Its current free form displays five seconds at 480p and accepts text or a pair of start and end images. The free workflow includes verification and may involve queue waiting. Give the prompt a specific end state you can look for later.Use Flaq AI to sketch the exit in shot B. Its free page lists MiniMax H3 with built-in audio, and offers text or a pair of frame images. Add an audio direction if you want to explore the sound of the movement. You can mute the clip while evaluating the cut.A small station concourse at dusk, with a fixed eye-level camera. A wide dark red square pillar fills the centre foreground. Soft light enters from the left over pale grey floor tiles. An orange wheeled suitcase rolls left to right along one tile seam and disappears completely behind the pillar. Hide the case and the black handle before the shot ends. Keep the camera and light steady.
Both sites describe free use without signup and unlimited total generations. Make each retry answer a question. Is the pillar wide enough? Does the case come out of the correct side? If you use frame inputs, prepare a complete pair for each shot. Matching the fixed objects and the path gives you something more specific to judge than asking for a “smooth transition.”The same small station, fixed eye-level view, dark red pillar in the centre foreground and soft window light from the left. At the opening, the suitcase is completely hidden behind the pillar. An orange wheeled case emerges from the right edge of the pillar and keeps rolling right along the same tile seam. Quiet wheels and a soft station ambience. The camera stays still.
Check three things at the edit
Mute both clips. In shot A, find a frame after the case disappears. In shot B, find a frame before it emerges. Try a straight cut between those frames, then step over it and play it at normal speed.- Coverage. Look along both edges of the pillar and just above the floor. A visible corner, handle or shifting suitcase shadow can give away the join. Move the cut within the hidden interval or choose another take with more coverage.
- Direction. Follow the case into and out of the hidden area. It should travel left to right on both sides. Check the wheel line against the floor seam if its path looks wrong.
- Background. Alternate between the two cut frames. Watch the pillar edge, the tile seams and the light on the exposed floor. A small brightness difference may be correctable in the editor. A pillar edge that moves or reveals a bright strip is a reason to try another pair.
Once the motion reads at normal speed, listen again. A sudden change in the wheel sound can make the cut noticeable even when the picture matches. Use room tone you have permission to use, or try a short overlap if both audio tracks are clean. Watch and listen all the way from the approach to the exit. The hidden moment should leave enough evidence on either side for the viewer to follow the same case.
The AI VideoWeb team at FLAQ TECH PTE. LTD. prepared this guide with AI assistance for writing and illustrations. It includes links to AI VideoWeb and Flaq AI.
Last edited: